Where do I get my inspiration? Pinterest of course! Here is a link to my food board. You may just get inspired yourself! Happy pinning!
Tuesday, December 4, 2012
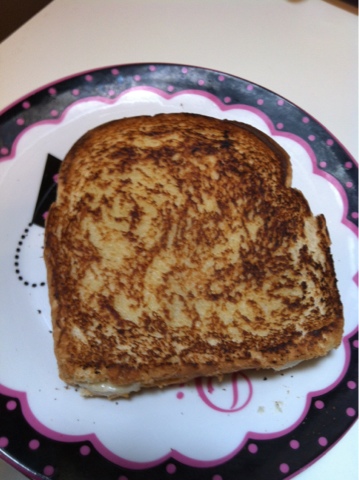
A recipe to try!
My mom and step-dad went on vacation this June for their anniversary and while they were there they had what my mom said was the best chocolate cake ever! Of course she brought back the recipe for me to make since I got the baking genes out of the two of us! I haven't tried it yet, but here it is for any of you who may be brave enough to go before me!
Chocolate Zucchini Cake
2 1/2 cups sifted flour
1 tsp baking soda
1/2 cup margarine
1 3/4 cups sugar
1 tsp vanilla
2 cups grated zucchini
3/4 cup nuts, chopped
1/4 cup coco
1 tsp salt
1/2 cup cooking oil
2 eggs
1/2 cup buttermilk
1- 6oz package of semi-sweet chocolate chips
Combine in sifter flour, salt, coco, soda, and set aside. Cream butter, sugar, and oil until fluffy. Add eggs one at a time, add vanilla. Add dry ingredients and buttermilk alternately. Beat well. Stir in zucchini. Pour into greased 9x13x2 pan. Sprinkle with chocolate chips and nuts. Bake for 55 mins at 350 degrees or until a tooth pick comes out clean.
Veggies in your cake? Hey it has chocolate in it so it can't be too bad right? Enjoy!
Cranberry Pecan Oatmeal Muffins
I have a confession. I am a sucker for anything that has cranberries in it. So you can imagine how much I love fall and winter! Cranberry bread, cranberry orange scones, cranberry salad, you name it I'll try it. And I will probably love it! When I had to do a presentation over an other blog I knew I would bring a treat to class with me. I did my presentation over the Brown Eyed Baker blog. My class is a morning class, so I wanted to bring a little breakfast treat for everyone! You can read Michelle's original recipe here. I was really hesitant to use dates so I just doubled the cranberries. Enjoy!
Ingrediants
1 cup traditional rolled oats
1 cup all-purpose flour½ cup light brown sugar1 teaspoon baking powder½ teaspoon baking soda½ teaspoon salt½ teaspoon cinnamon¼ cup finely chopped pecans 1/2 cup dried cranberries ½ cup unsalted butter, melted and cooled1 cup buttermilk1 large egg, lightly beaten½ teaspoon vanilla extract
In a large bowl combine all of the dry ingredients.


My Favorite Pecan Pie

Wednesday, November 28, 2012
The Way to a Southern Man's Heart
Ladies, if I have picked anything up in my 21 years on this Earth it's this. There are three simple ways to catch any boys attention.
1. Be able to cook. You may be able to cook better than his mama but you will never out cook his grandma. Thats just how it is. But there is nothing saying that you can't try!
2. Be able to shoot a gun, and actually hit what you are aiming at! I have never seen my daddy more proud of me than when I shot my first deer. My step dad gets a little bit of pride every time I hit the target when we practice shooting. Ladies, I know hunting my sound boring, gross, or cruel, but it is actually pretty fun!
3. Know how to drive a truck. To me there is nothing more attractive than a guy in a truck. And you know what? Guys think it's awesome when you aren't afraid to jump behind the wheel of his truck and actually know what you are doing! Besides you feel pretty awesome driving it anyway!
So this is my list so far! I can say that I can do all three and break a sweat with number three knowing that their trucks are their babies so I better not mess it up! I just shot my first deer over Thanksgiving break and it was awesome! Here is a picture of me and my proud poppa! Be expecting recipes for deer chili in December!

Thursday, October 25, 2012
Crafts for my littles!
I am a member of a sorority on my campus, Sigma Phi Lambda, and every semester we do a Big Sis- Little Sis appreciation week! Well this semester I was very inspired to make lots of crafts for my littles! I am telling you, if this is any sign of how I will treat my children they will be spoiled rotten for sure!
The first thing I made was a canvas I painted and then glued embellishments and a saying on. To paint the stripes I used blue painters tape and then painted the space in between. The flowers I purchased at Hobby Lobby in the scrapbooking section. I saw the little saying on Pinterest (of course right??) and I simply used Mod Podge to glue it down! They say "We're not sisters by birth, but we knew from the start; God put us together to be sisters by heart!" If you notice I did one with vertical stripes and one with horizontal stripes. Yes this is on purpose! I try to make things that are the same yet a little different since I have twins!
.JPG)
The next thing I made is a picture frame. Well I really just embellished it! I grabbed a spool of ribbon and a rhinestone "buckle" both from Hobby Lobby. I am thinking at this point they need to give me frequent shopper points or something! lol I made a bow from the ribbon, slipped it through the buckle and hot glued that puppy down. Viola! A super glam frame that was super easy to make! Or embellish ;)
.JPG)
The final thing I made them were aprons. I bought the red aprons at, where else, Hobby Lobby. I used blue painters tape to make my rectangle, painted inside it with basic black acrylic craft paint, let it dry and used glitter puff paint for the letters! Easy as that! You all know by now that I love to cook, so now when my littles' come over they can use their aprons and cook with me!
.JPG)
Wednesday, October 24, 2012
Easiest, Creamiest, Pot Pie Ever!

Ingredients:
1 box stuffing
2 cans cream of chicken soup
1 can mixed veggies, drained
1 large can of chicken, drained
1. Cook the stuffing according to the box directions and set aside.
2. In a large bowl mix the remaining ingredients. Once combined place in a casserole dish.
3. Cover chicken mixture with stuffing in a even layer.
4. Place in 375 degree oven for 30 mins or until warm and bubbly.
Didn't I tell you this was simple?? Now go enjoy your "pot pie" and cuddle up!
Tuesday, October 23, 2012
My Roomie is 21!!!!
.JPG)
Thursday, September 27, 2012
The BEST Chocolate Butter Cream Frosting!
I'll admit it, I fit the girl stereo type of loving anything and everything chocolate, so any excuse I have to make something chocolate flavored I will! When I asked one of my friends what kind of cupcakes he promptly said chocolate with chocolate icing. I knew it was time to try a new chocolate icing recipe! I think I may have a new favorite chocolate icing! It was super easy to make and SO yummy! This will be my go to frosting from now on! YUM! Let's get started!
 Chocolate Butter Cream Frosting

4 cups powdered sugar
2 sticks of butter at room temp
1/4 teaspoon salt
1 teaspoon vanilla
1/2 cup unsweetened coco powder
1. Cream butter until white with the paddle attachment of your stand mixer. You want the butter to be soft and creamy.
2. Sift in the coco and the powdered sugar slowly. You don't want your sugar to go flying out so set your mixer on the lowest speed until the sugar and coco are combined. After they are just combined turn your mixer up to a medium speed.
3. Add your salt and vanilla and mix on a medium to high speed for three minuets. If your icing isn't as thick as you would like it to be you can always add more sugar to the mix.
Thats it! Easy right? And SO SO SO good! I had left over icing after piping it on to 18 cupcakes, so of course that meant me and my roommates just HAD to eat it over a couple of days, dipping graham crackers into it. Enjoy!
Monday, September 24, 2012
The Elvis
If you know me, you know I LOVE Elvis. But not in the weird "He's still alive, he just got abducted by aliens. The King will return!" kind of way. I love Elvis because I love his music. I love the era he was a part of. I love that his music defined a generation and closed a gap between races with his music. My love was taken to a whole new level when in the 5th grade my mom and step-dad asked me where I wanted to go on vacation. Without hesitation I said Memphis, Tennessee. I got to see all things Elvis including the Mecca of Elvis fans: Graceland. On our stop in the kitchen of our audio tour I learned that Elvis enjoyed fried peanut butter and banana sandwiches. So today I decided to created my version of Elvis's favorite food. Let's get started!
"The Elvis"
Ingredients
2 slices bread
butter
peanut butter
banana

Butter one side of each of the pieces of bread. I never claimed this sandwich would be good for you ;)

Spread peanut butter on the "dry" side of the bread. A good layer, not too thick but you don't want to be able to see the bread through it either.

Cut about 6 pieces of banana and place them on the peanut butter on one piece of the bread. You can cut them as thick or thin as you like.

Assemble your sandwich and place it on a hot skillet. Grill it just like you would a grilled cheese.

And this is the result. A warm, melt-y, yummy, sandwich. I know why Elvis loved these so much now! I am a believer! Simple and delicious! Enjoy!

Thursday, September 20, 2012
Creamy Tomato Basil Soup
Ahh, fall. It's time for sweaters, boots, and most important...SOUP! Growing up I was not a big fan of tomato soup because all I knew of it was straight out of the can. Eww. When in high school a bakery in town offered a creamy tomato soup and grilled cheese special on Thursdays. After that I was hooked and I had to find out how to make it on my own! In my searching I found this recipe, and while it isn't quite what that bakery makes, it is good in it's own right! And did I mention it is SUPER easy?? Let's get started!
Creamy Tomato Basil Soup
2 cans condensed tomato soup
1 can tomato puree
1 can diced tomatoes
1 16 oz. block of cream cheese
1 cup milk
1 1/2 teaspoon of Italian Seasoning
1/2 Garlic Powder
 In a medium sized soup pot put all the canned ingredients and the milk in a pot and bring to a boil. Add in your spices and stir.
 Cover your soup and simmer for 10 minutes.
 While your soup is simmering, cube your cream cheese. This is easier if your cream cheese is cold. In other words don't keep it out on the counter while you are doing everything else. Keep it in the fridge so it will be firm when you try to cube it.
 After your soup has been simmering for 10 minutes, put in your cream cheese. The recipe I have said to "melt the cream cheese." Fun fact, cream cheese doesn't really melt. It just turns into smaller pieces. Still yummy!
 After your cream cheese is "melted" you can enjoy your soup! Be careful you will want more than one bowl!

Creamy Tomato Basil Soup
2 cans condensed tomato soup
1 can tomato puree
1 can diced tomatoes
1 16 oz. block of cream cheese
1 cup milk
1 1/2 teaspoon of Italian Seasoning
1/2 Garlic Powder


Starbucks Announces Single Brewing Station
Starbucks, the coffee giant, announced that they are introducing their own coffee brewing system called Verismo. Their edge they say? A specialized coffee pod that will allow you to make lattes at home. The machine will use fresh milk and try to reproduce the product that you can get at the store. While this "milk pod" is a new turn to the products on the market I don't think I will be going out and getting one anytime soon. I have a little bit of an attachment to my current Kurig. Starbucks even has their own K-cups if you really just HAVE to have their brand of coffee. I may not have the most refined coffee tastes or maybe their really isn't that big of a difference between other coffees and Starbucks other than the name. I'm not sure. I do know that my Kurig can get me out the door with a cup of coffee in just under 2 minutes. Granted I do not normally drink milk in my coffee unless I am getting it from a coffee chain. Every once and a while I get a small health kick and decide I can drink my coffee without milk just to spare calories. For me, I will stick with my Kurig and Green Mountain coffee. Unless Starbucks wants to prove me wrong by giving me a free machine. In that case, I won't object! Starbucks to

Starbucks to Introduce Single-Serve Coffee Maker
(New York Times Article)

Starbucks to Introduce Single-Serve Coffee Maker
(New York Times Article)
Thursday, September 13, 2012
College football means one thing...FOOD!
Saturdays in the South mean one thing. College football! Now me personally, I am more of a NBA fan but all of my friends really love it so I see it as an opportunity to cook! This past Saturday I tested out some favorites along with a new recipe I found on Pinterest. Everyone loved what I made but with it being free food, who would complain? Our menu was: French Bread Pizza, Jalapeno Poppers, MexiCorn Dip, and my grandma's Chocolate Sheet Cake. In this post I am just going to talk about the appetizers and have the cake in my next post. It is a lot more labor intensive the other foods today! Let's get started!
French Bread Pizza

Jalapeno Poppers

For these poppers all you need is a can of crescent rolls, cream cheese, and sliced jalapenos. One can of 8 crescent rolls will yield 16 poppers. To prepare cut each crescent roll triangle in half, place a small dollop of cream cheese on the new smaller roll, then place two jalapeno rings on top of the cream cheese. Wrap up in a bundle and bake at 350 until golden brown. You might want to make more than one package of these because they go fast!
MexiCorn Dip

This dip is my go to dip to take to any gathering I am invited to. It is so simple, requires practically no prep time, and is always a hit! For this dip you need one 16 oz container of sour cream, 2 cups of shredded cheese, 1 can of drained Rotel, and 2 cans of drained MexiCorn. Now throw all of those ingredients into a container, stir it all together, and chill until you are ready to serve! The picture above does not do it justice! I had to fight off my roommate's boyfriend just to get this picture!
Grandma's Chocolate cake

Thursday, September 6, 2012
Improvements: A class assignment
So going along with my last post about what I have learned so far we are supposed to keep two questions in mind with our blogs. What can we improve? And what can make them more interesting?
Obviously my blog is still a baby blog so I am sure there are tons of improvements I could make. First my picture quality is terrible! I shoot all the pictures of my food and crafts with my cell phone. I know I could have much better pictures with an actual camera. My layout is still a little off to me as well but I think I can fix that in time once I get more comfortable with the blogger site.
How do I make it more interesting? I already think it is interesting! Ha! But if I HAD to make something up I could do a weekly feature. Maybe every Tuesday do my own version of a recipe by a famous chef or a Pinterest craft Sunday. We will see if those ever come about but I could see them happening in the future!
What I Learned: A Class Assignment
As I mentioned before this blog was created for a class I am taking so you can expect posts for class time to time. Just so happens today is the first time I have to post for my professor. We were supposed to read Technorati's State of the Blogosphere 2011 and write about what we learned about our own blogs. So here ya go!
1-I am a hobbyist. I post about what I love to do and (unfortunately) I am not getting paid to do it. At least not yet!
2-I am in the smallest group of bloggers, females aged 18-24. When I think about that it makes sense. Most of the blogs I follow, while they are female, they are aged 25-34, the largest age group of bloggers.
3-The most professional bloggers post 1-2 times a day but I will follow trend of most hobbyist bloggers and post 2-3 per week.
4- Regular postings generate more followers. I am more apt to follow someone if they most regularly so I will do that as well. I don't want my readers to get bored while waiting for me to post or forget about me in-between postings.
5-Most hobbyists do not post reviews on products and services. I probably will not either, but if I am using a product in a post you can bet I love it and I will probably tell you why! Not a review just an FYI!
Wednesday, September 5, 2012
Parmesan Chicken Alfredo *Remix*
It's 9pm. I just got out of my one evening class of the week and I am STARVING. I made the fatal mistake of not eating a snack on my hour break between work and class. So of course for the last half of class all I could think of was what I could throw together fast as soon as I got home. I knew I had a left over piece of parmesan crusted chicken from my dinner out with the girls the night before and I had some noodles I could boil. The result was a make shift Alfredo sauce to top off my noodles and left over chicken. I must say I am a little impressed with myself! It turned out better than expected! So here it is!
Parmesan Chicken Alfredo *Remix*
Ingrediants:
1/2 cup milk
1 tablespoon butter
2 tablespoons parmesan cheese
1/4 tablespoon Italian seasoning
fettuchinni noodles
left over parmesan crusted chicken (this is what makes it the remix!)


I am assuming everyone knows how to boil noodles, so I will leave that part out. Just cook them to your liking. I am more of a firm noodle girl. Al dente is the technical term. Fancy right?
So to make my sauce I measured out a 1/2 cup of milk and poured in what I am guessing was about 2 tablespoons of parmesan. I tend to just eye ball measurements, so sorry! Then I added what I am guessing to be about 1 tablespoon of butter. Again, sorry for the inaccuracy! Microwave that until the butter melts, it only took me 30 seconds.
This is where my experimenting kicked in. I watch Food Network like nobody's business and I remembered someone (of course I wouldn't remember who!) talking about how a rue is a base for all creamy sauces. A rue is just melted butter, four and milk. Easy! So I added in flour little by little with a regular spoon until I thought it was just about thick enough. So four spoons later and 15 seconds in the microwave I had my sauce! BE CAREFUL! I accidentally put the sauce in for too long and it got SUPER thick! But it was an easy fix, just a couple splashes of milk and it thinned back out!


Now the fun part! Eating! Noodles, left over chicken, sauce. YUM! It took about 30 minutes in all. Easy, yummy, and college budget friendly!


Tuesday, September 4, 2012
Diet Dr Pepper Brownies
Ok so sometimes I make things that aren't so great. It's RARE but it happens haha. Well this is one of those times. Since I am fully committed to this blog I will show you the completely terrible things I make along with the good. The recipe is supposed to be Weight Watcher friendly, but you should probably know by now that I don't buy into that. So let's get to it.
Diet Dr Pepper Brownies
Ingredients:
One box brownie mix
One 12 oz can of Diet Dr Pepper
Non-stick spray
 Preheat oven to 375 degrees Fahrenheit. Pour brownie mix into your mixing bowl. I went ahead and blended my mix just to break up any clumps.
 Next add in the can of Diet Dr Pepper. It will fizz alot! When ever you start to mix the ingredients it will foam and start to look kind of fluffy.
 Spray your 9X9 pan with a non-stick spray. I LOVE my Misto. You fill it with what ever kind of oil you want, give it a few pumps and voila! Cooking spray! It is awesome!
 Pour your brownie batter into your greased pan. And here is where I made my mistake. I went ahead and poured in the Carmel packet. Don't do that! It sinks to the bottom and is gross.
 Place it in the oven and bake for about 25 mins until a toothpick inserted into the middle comes out clean.

And here they are! Kinda spongy on the top and the bottom is gooey and Carmel-y. If you like that sort of thing then these are for you! Personally I will take my fattening brownies with eggs and oil!
Diet Dr Pepper Brownies
Ingredients:
One box brownie mix
One 12 oz can of Diet Dr Pepper
Non-stick spray


And here they are! Kinda spongy on the top and the bottom is gooey and Carmel-y. If you like that sort of thing then these are for you! Personally I will take my fattening brownies with eggs and oil!
Wednesday, August 29, 2012
Hey Y'all!
Welcome!!! For my first post I figure you should know a little about me and why I am starting this blog. I am a college junior studying public relations in Oklahoma. One of the classes I am taking this fall semester is Blogging for Journalists. OK, I get 3 credit hours to blog?! Sign me up! I am a self confessed Pinterest addict so I have found many blogs through there that I follow on a regular basis. I felt like I had some pretty good stuff to say after reading through some of these blogs so this class was a push to get me started!
I always joke around with my friends that I am a trophy wife in training since I cook and craft all of the time. I grew up learning how to cook from my grandma so you can expect down home Southern cooking. I also like to branch out from time to time though and try new recipes that I find either on the Internet or in magazines. Have suggestions for me? Let me know! I cook for my friends here in college so that varies from my health conscience sorority sisters to my fraternity guys who will eat pretty much whatever I put in front of them! If you are looking for a classically trained chef you are in the wrong place buddy! I am the queen of semi-homemade and simple recipes from scratch. If it doesn't taste good, I'm not making it! I love Paula Deen, maybe a little too much, so expect a lot of recipes inspired by her! And if you haven't noticed, I can be a little sassy! Tie on your best aprons gals! It's time to start training!!!
I always joke around with my friends that I am a trophy wife in training since I cook and craft all of the time. I grew up learning how to cook from my grandma so you can expect down home Southern cooking. I also like to branch out from time to time though and try new recipes that I find either on the Internet or in magazines. Have suggestions for me? Let me know! I cook for my friends here in college so that varies from my health conscience sorority sisters to my fraternity guys who will eat pretty much whatever I put in front of them! If you are looking for a classically trained chef you are in the wrong place buddy! I am the queen of semi-homemade and simple recipes from scratch. If it doesn't taste good, I'm not making it! I love Paula Deen, maybe a little too much, so expect a lot of recipes inspired by her! And if you haven't noticed, I can be a little sassy! Tie on your best aprons gals! It's time to start training!!!
Subscribe to:
Posts (Atom)